Buy a decent pair of aviation snips to cut metal corset boning.
As I will advise with most tools. Buy the best one you can afford.
There are a lot of very similar-looking snips out there. Often the metal quality varies. If they say “German-style”, usually they are cheap imitations and are not value for money even if they are a tenth the price. Always buy REAL German ones!
They must have serrated blades, not smooth.
Mine are German steel straight cut (you can get left and right-angled positions too). Costing $45 in 1998; I have used them for 19 years. They are still good and make clean cuts.
As an experiment, I also bought a pair for $10. They lasted about 4 months. Plus even though they were new they were tough on my wrists and the bone would often bend in the blades. If you are planning to make several corsets and costumes that will require boning.
Good quality Aviation snips are an essential tool and a clean cut is vitally important. Every other step for corset boning is built from a clean cut.
Flat Boning
To cut flat bones, snip straight across and then snip the corners. Note only snip corners if you are using good quality snips, cheap ones will bend it and burr the steel.
If you already own a cheap pair and struggle with bent and bad cuts. Then I suggest taking your boning material to a tool shop/ builders merchants/ local hardware shop that sell decent quality tools and try a test cut.
The feeling of OMG why did I not know this job could be a joy and not a nightmare will be so strong. You will want to buy a decent pair as soon as you can afford to.
Don’t be fooled by a cheap pair cutting ok the first time, they will not last and will cause you grief in the not too distant future.
Check the end of each piece of boning after cutting. If there are any burrs grip it in your pliers to flatten it as much as possible and /or then rub it on a metal file or emery paper.
The better the Aviation Snips are to start with the better the cut will be overall.
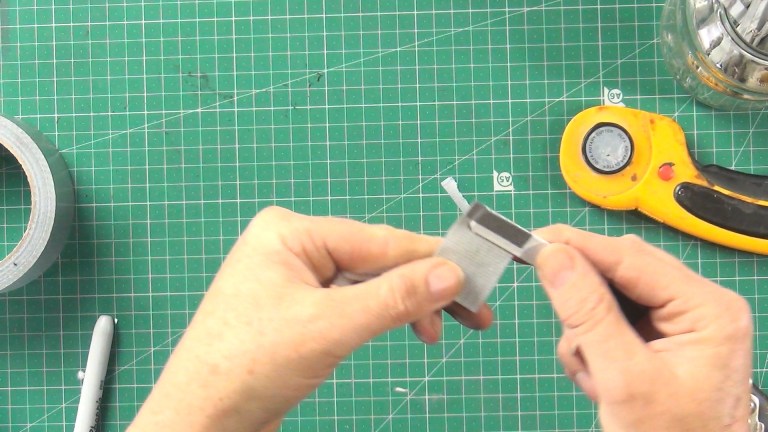
The ends can be capped, dipped or taped. Over the last 20 years, I have used all three methods.
The best by far, and I have had zero failures out of thousands of corsets I have made, is to wrap the ends in a short length of duct tape.
Again don’t use the cheap stuff from the dollar store, buy a decent brand or go to builders merchants.
Once again this method works if you have a good clean cut.
Simply wrap the end in a length of tape, press ends together and cut a curve.
Spiral Boning
Spiral boning can be trickier to cut. I have seen people do all kinds of things to it. Often leaving poking and bent sprained bones and a lot of stress along the way. If you own a quality pair of aviation snips this will not happen!
You cut each wire one side at a time. Don’t try to cut the entire width in one go.
There is No need for some of the crazy pliers bending vice holding crazy stuff that I have seen on YouTube.
The ends of spiral boning need caps. If you own or plan to buy the simple eyelet machine you can get special die fittings to press the ends flat, but the job can be done with two sets of cheap pliers.
Position the end cap onto your neatly cut bone, squeeze the sides of the cap gently, then flatten caps slightly, changing the positions of pliers to help with each action. It’s best to do this slowly until you have your own rhythm.
Take a thin strip of flat steel boning or anything solid that is narrower than the end cap. This is so you can crimp the centre of the cap edges, but not the outer edge.
Place the thin strip of bone in the centre of the cap and squeeze with your pliers so you press the centre of the cap down. This will crimp the cap so it won’t fall off.
Remember flat bones for the centre front and back of your corsets, spirals for the sides and curved seams.
If you want extra support on the centre front or behind a rather flexible busk (as some of the cheaper corset busks can be). Then just double up the bone, one behind the other and tape together with a bit of duct tape, it’s a simple trick but can make a big difference.
We use cookies on our website to give you the most relevant experience by remembering your preferences and repeat visits. By clicking “Accept All”, you consent to the use of ALL the cookies. However, you may visit "Cookie Settings" to provide a controlled consent.
This website uses cookies to improve your experience while you navigate through the website. Out of these, the cookies that are categorized as necessary are stored on your browser as they are essential for the working of basic functionalities of the website. We also use third-party cookies that help us analyze and understand how you use this website. These cookies will be stored in your browser only with your consent. You also have the option to opt-out of these cookies. But opting out of some of these cookies may affect your browsing experience.
Necessary cookies are absolutely essential for the website to function properly. These cookies ensure basic functionalities and security features of the website, anonymously.
Cookie
Duration
Description
cookielawinfo-checkbox-analytics
11 months
This cookie is set by GDPR Cookie Consent plugin. The cookie is used to store the user consent for the cookies in the category "Analytics".
cookielawinfo-checkbox-functional
11 months
The cookie is set by GDPR cookie consent to record the user consent for the cookies in the category "Functional".
cookielawinfo-checkbox-necessary
11 months
This cookie is set by GDPR Cookie Consent plugin. The cookies is used to store the user consent for the cookies in the category "Necessary".
cookielawinfo-checkbox-others
11 months
This cookie is set by GDPR Cookie Consent plugin. The cookie is used to store the user consent for the cookies in the category "Other.
cookielawinfo-checkbox-performance
11 months
This cookie is set by GDPR Cookie Consent plugin. The cookie is used to store the user consent for the cookies in the category "Performance".
viewed_cookie_policy
11 months
The cookie is set by the GDPR Cookie Consent plugin and is used to store whether or not user has consented to the use of cookies. It does not store any personal data.
Functional cookies help to perform certain functionalities like sharing the content of the website on social media platforms, collect feedbacks, and other third-party features.
Performance cookies are used to understand and analyze the key performance indexes of the website which helps in delivering a better user experience for the visitors.
Analytical cookies are used to understand how visitors interact with the website. These cookies help provide information on metrics the number of visitors, bounce rate, traffic source, etc.
Advertisement cookies are used to provide visitors with relevant ads and marketing campaigns. These cookies track visitors across websites and collect information to provide customized ads.